Tuesday, October 13, 2009

Head Bang-er

I designed the HEAD BANG-ER with the 70's in mind. Fads come and go. Head gear never completely goes out of style, just the way we wear them. So hopefully I have come up with a fun way to wear this headgear that will never go out of style. I hope you find this a unique way to keep your bangs under control with my latest design HEAD BANG-ER.


What you'll need will vary slightly depending on which variation of the headband you are going to make. There are 3 different styles/versions to this headband. The size will be determined by who you are making this headband for. Another words, the size of the head.
*The pattern given is the instructions for the standard adult size headband.


What you'll need:
4 US and 9 US straights or circulars, *5 Double pointed needles 4 US (DPN's) If you are doing the pick up stitches on both ends to create a wider tie on. Otherwise 2 Double pointed needles 4 US are needed for simple I-cords.
Yarn used is whichever you choose that will suit your taste. Gauge is not really an issue with this pattern.
*I used Comfort yarn for the MC and Fjord yarn for the CC.
Darning needle
*Elastic "ouch less" bands. These are needed for method #2
*T-pins or straight pins for seaming.
Here's How:
With US 4 and Contrasting Color (CC)
Cast on 7 stitches. (Making sure to leave a long enough tail for seaming your headband)

  1. Knit
  2. Knit
  3. Knit
  4. Knit
Change to US 9 needles and Main Color (MC) *DO NOT CUT THE CC YARN. You are going to run the yarn not in use up the RS edge throughout the pattern. Making sure to twist color not in use over the color in use.
       5. Knit into f,b&f of every stitch. (21 sts.)
       6. *P1, k3 rep from * ending with p1.
       7. *K1, p3 rep from * ending with k1.
       8-12 Repeat rows 6 and 7, ending on WS row.
 Change back to US 4 and CC.
       13. K3tog to end. (7 sts.)
       14-16 Knit
Repeat rows 5-16 another 4 times more, or until desired length. On the last repeat, make sure to knit 4 rows as in rows 1-4 in the beginning. Bind off.

Blocking can be done simply by spraying your headband with a water bottle or using a damp towel and placing it over the headband.
 Seaming is an option.
I have 3 different variations for this headband:

  1. Leaving it open without seaming the headband together horizontally. If you are going to use this method, you are then going to pick up stitches at both ends to make your I-cord ties. With 2 DPN's and CC pick up 3 sts. evenly on both ends of headband. Work i-cord until you achieve the desired length, that would be the length long enough to tie your headband together in the back.
  2. Seaming it together horizontally. With your large rubber (ouch less) band, lay it inside the headband horizontally and pin the CO and BO ends together. Now with the MC yarn seam the headband together making sure not to catch the rubber band when sewing. Sew in any loose ends and your done.
  3. Seaming your headband together as if you knit it in the round. If you do this method, make sure you have made it large enough to join and still fit your head.

  Pattern Tester
I'd like to thank Tracey McDowell for her professionalism in test knitting the Head Bang-er pattern. Her skills as a test knitter are second to none.


Sunday, October 11, 2009

Grid Rock

Grid Rocks are a rebirth of my “Your Panties Rock”. Just another way to embellish and redo something old to something new. 

WHAT YOU'LL NEED:
  1. "Your Panties Rock" rocks. Pattern here: http://straightjacketknitting.blogspot.com/2009/08/your-panties-rock.html
  2. Fishnet Stockings
  3. Felting needles *felt puncher (optional)
  4. Roven wool *any color/colors you desire
  5. Scissors
HERE'S HOW:
  1. Take your rocks one at a time and slip them into the stocking, making sure to place them all the way down to the foot area if you are making more then a couple of Grid Rocks. After each rock tie the stockings around each individual rock.
  2. When all the rocks are tied and secure, place the stocking filled rocks into your washing machine on the hottest cycle you have, you may need to repeat the wash cycle more then once. When you are satisfied with your results make sure to complete the spin cycle to get all the excess water out.
  3. Cut the rocks out of the stockings, being careful not to cut away the grid. If you only want the grid on one side then pull the grid off the side like least. Use your scissors to trim excess stocking away.
  4. Lay your rocks outside in a sunny are with the concrete for quicker drying power. The cement absorbs the moisture quicker.
  5. When your rocks are completely dry, it is now time to design.
  6. Depending on your design, start off with a small peas size amount of wool and roll between your hands, to create a pea size ball. Then place wool over your first grid square and with felting needle start poking away. Being careful not to poke yourself. They are sharp little boogers.
  7. When you have completed all the squares, take your felting punch and punch away. It makes the wool more secure and stable.
  8. I then take my Grid Rocks and with some liquid soap and hot hot water I soak them in a bowl for an hour or so.
  9. Take your Grid rocks out of bowl and trim the excess wool to refine your squares. You can now press on them to remove the excess water out and then once again repeat Step 4 again.
  10. The options to decorate are endless.


Monday, October 5, 2009

TRICK OR TREAT MY EX KAL

Did I ever mention that I got married on October 31, 1987?
wedding

I also got divorced, (that date seems to escape me right now). LOL I thought it would be fun for whoever wants to join in and knit up your version of the “My Ex” bag to use for Trick or Treating. Sign up if you dare. Muwahhhhhhhhhhhhhhhhhhhhhhhhhhhhhhhhhhhh
You can sign up on Ravelry or here. My Ravelry group is: ADHD KNITTING  http://www.ravelry.com/groups/adhd-knitting

KITS ARE AVAILABLE FOR “MY EX BAGS” FOR $45.00 (SHIPPING INCLUDED)

 HERE’S WHAT’S INCLUDED:
EX BAG

  • PATTERN
  • 2 BALLS OF FJORD YARN IN TWO DIFFERENT COLORS (SKIN COLOR, HAIR COLOR), YOUR CHOICE. This yarn is amazing, it felts with just a little bit of hot soapy water and some hand rubbing.
  • 2 STRAND OF BEADS TO USE FOR THE DREADS
  • 1 FAUX “CATS TOOTH”
  • 1 NOSE RING (YOUR CHOICE OF BAR OR RING PIERCING)
  • 2 COLORS OF ROVING WOOL TO NEEDLE FELT THE FACIAL FEATURES.
  • 1 NEEDLE FELTING NEEDLE
  • FINALLY, YOUR CREATIVITY AND IMAGINATION…
Here’ the PayPal information:
toreonbf@yahoo.com


Sunday, October 4, 2009

IT'S CURTAINS...

Go here for the "IT'S CURTAINS" tutorial, pattern is on this page.
I took an old shower curtain and cut it into long strips going with the flow of the grain and then tied them all together to create a wonderful ball of fantastic fiber. I am now going to attempt to knit this into a bag.
Yarns suggested
Plastic Shower Curtain
“IT'S CURTAINS”
Thanks to someone with the capacity to utilize the left side of their brain sent this post to me:
Would this be a good time to mention that if you had cut within an inch or two of the side going from left to right, then cut an inch higher going from right to left to within an inch or two of the other side, then repeat going in a zig zag across the curtain to the end, you might end up with a continuous strip of plastic curtain?
This from another smart left thinking person:
The shower curtain, whether new or used, would be easier to lay out; with a good rotary cutter, one could fold and cut it with fewer passes.*
“IT'S CURTAINS”
I took an old shower curtain and cut it into long strips going with the flow of the grain and then tied them all together to create a wonderful ball of fantastic fiber. I am now going to attempt to knit this into a bag.
“PLEASE, DO ATTEMPT THIS AT HOME”
Make sure no one is taking a shower when you decide to reuse your shower curtain.

DISCLAIMER: I know this is not a new idea, but the plastic bags don’t usually come in all these great colors and the prep work when using a shower curtain is much less time consuming. The results are virtually the same. Hugs, Gail
  
WHAT YOU'LL NEED:
  1. 3 shower curtains or plastic tablecloths. (Fabric of either two will work as well)  two for knitting and one for the lining, depending on the size you are going to make your bag.
  2. scissors
  3. powder
  4. US 11 straights and US 13 circular knitting needles
  5. darning needle
  6. 1 stitch marker
  7. You will need to add straps one or two is totally up to you.
  8. grommets
HERE'S HOW:
With US 11 straight needles CO 50 stitches
  • Rows 1-10 Knit stockinette stitch. (Knit one row, purl next row, continue until you have 10 rows in all.)
  • Then you are going to change to your US 13 circular needles and pick up approx 100 stitches working from your stitch marker, P/U stitches completely around the base, which is now going to be the bottom of your bag.
  • When you have all your stitches picked up you are going to join as to work in the round. Continuing in stockinette stitch for approx  10"-12" depending on how big you want your shower curtain bag to be. Or depending how much shower curtain yarn you have. 
  • Once you have knit your desired length and or size of your bag BO all your stitches. 
  • Now for the top portion of your shower curtain bag you can use the top portion of the shower curtain that usually has grommets. That way you can make a drawstring closure for that extra touch. 
  • Straps can be made using the same technique as your bag or you can add whatever type of strap you please. 


Saturday, October 3, 2009

Bed Bugs, and Head Bugs


Pattern on it's way. Boo!


Thursday, October 1, 2009

Breast Cancer "Be" Awareness Month

My hopes and prayers go out to all the women and men in our world who are afflicted, know someone or has lost someone from this dreaded disease. 


WE CAN ALL MAKE A DIFFERENCE ONE FEEL AT A TIME.
Rx: “Booby Trap”
Difficulty: Medium
Use With: 2 balls of Fjord yarn (in your skin color), 2 shades of Roving Wool (one color for areola and one color for the nipples),
Special Items Needed: Needle felting needle, nipple ring(s)
Special Techniques: knitting in the round, decreasing, crochet, felting
Don’t touch your boobs without the right equipment! For only $45, ADHD Knitting is offering the “Booby Trap” KIT which includes everything you need for a great set of boobs! $1 of each “Booby Trap” kit sold will be donated to breast cancer research.
1. Pattern
2. 2 balls of FJORD yarn in your choice of “skin” color. Click on the
“Fjord” yarn section of my Etsy store to choose your color.
3. 2 nipple rings
4. 2 colors roving yarn to make the areola and the nipple. (Your color
choice)
5. Needle felting needle
Directions: You will make 2 boobs exactly the same.
FIRST BOOB
CO 82 sts. and join (making sure not to have any of your sts twisted) to work in the round. Make sure that you place a SM (stitch marker) at the beginning of the round.
If using DPNs, separate the 82 sts evenly onto 4 of the DPNs.
Rounds 1-6: Knit (Working in the round, knitting every round of stitches results in stockinette stitch.)
Round 7 (decrease round): K8, K2tog to end of round (72 sts) Rounds 8-12: Knit
Round 13 (decrease round): K7, K2tog to end of round (64 sts) Rounds 14-17: Knit
Round 18 (decrease round): K6, K2tog to end of round (56 sts) Rounds 19-21: Knit
Round 22 (decrease round): K5, K2tog to end of round (48 sts) Rounds 23 & 24: Knit
Round 25 (decrease round): K4, K2tog to end of round (40 sts) Rounds 26, 28, 30 & 32: Knit
Round 27 (decrease round): K3, K2tog to end of round (32 sts)
Round 29 (decrease round): K2, K2tog to end of round (24 sts) Round 31 (decrease round): K1, K2tog to end of round (16 sts)
Round 33 (decrease round): K2tog to end of round (8 sts remain)
Leaving a 4"-6" tail, cut yarn and with a darning needle weave the tail through the 8 remaining stitches making sure to repeat until the stitches are secure. Cut the remaining tail.
REPEAT FOR SECOND BOOB.
Page: 1/2
Design, original pattern, and sample by Gail Pasqualotto. Pattern editor Heather James.
2 Sets 16” US10 1/2
K-10 1/2
Set of 5 Size: US10 1/2
DPNs
SIDE STRAPS (MAKE 2)
Make sure you leave 4"-6" of tail on both ends of chain sts.
With your crochet hook, holding 2 strands of yarn together Ch. 60sts.
NECK STRAPS (MAKE 2)
Make sure you leave 4"-6" of tail on both ends of chain sts.
With your crochet hook, holding 2 strands of yarn together Ch. 80 sts.
SET YOUR 4 STRAPS ASIDE.
DO NOT SEW THEM ONTO THE BOOBS UNTIL AFTER YOU HAVE FELTED YOUR
BOOBS TO THE APPROPRIATE SIZE NEEDED.
NOW IT IS TIME TO FELT UP YOUR BOOBS.
FJORD YARN FELTS UP QUICKLY. I LITERALLY CHECKED THEM EVERY 5 MINS.
THIS IS IMPORTANT BECAUSE THE FELTING PROCESS IS GOING TO DETERMINE
YOUR CORRECT SIZE.
When you are pleased with the sizing (shrinking boobies), it is time to kinda play with
your boobs. Make sure to squeeze them thoroughly. (We don't want them drippy now,
do we?)
Take your “boobs” and placed them over your boobs so that you can eyeball where to
place your straps. When you are happy with strap placement, sew them securely onto
the felted boobs. You can now wet felt the straps by hand with just a little bit of warm/
hot water and some liquid soap.
Time to needle felt the girls...with your roving wool, needle felting needle, and the color
you have chosen for the areola, begin making a small circle right directly onto the felted
boob. It is up to you to choose the size you would like for the areola. When that is done,
it is now time to needle felt your nipples (ouch). Take the color
for the nipple (contrasting color, if that is what you nipples
look like - I used a lighter color for my nipple. It stands out
better - pun intended.) To make the nipple you just make a
tiny little bead like size ball with the roving wool. I just added
the roving right onto the areola and then started to make it 3D
and firm...it is kind-of like making a bobble, but out of roving
wool.
SEW BOOBS TOGETHER.
After both boobs are knit, seam them together by placing a
small portion of each boob’s right side together and seam
approximately an inch or two together.
DRUM ROLL PLEASE...
TIME TO ADD THE NIPPLE RING.
You can also add your own tattoos, preferably the pink logo
for breast cancer, but anything is great.
NOW PUT ON YOUR BOOBIES AND RUN AROUND THE
HOUSE, POOL, STREETS AND ACT LIKE A CRAZY PERSON.
( Oh sorry, you don't have to do that. That is just what I
did.)
*DISCLAIMER:
If you chose to go in public wearing your "BOOBY TRAP" you are responsible
for bailing yourself out of jail and all said fines that follow.
Please be sure and have a camera or video camera with you at all times if you
decide to do the above. We would love to see the reactions you get…
Follow my blog at www.straightjacketknitting.blogspot.com
Design, original pattern, and sample by Gail Pasqualotto. Pattern editor Heather James. Page: 2/2


Wednesday, September 30, 2009

One Carrot Necklace


One carrot necklace
Originally uploaded by STRJKTKNITTING

Pattern from
adhdknitting
This is a fun way to show off to your friends how many Carrot’s you have on your necklace, rings, bracelets or earrings.  I have the cutest little tinniest, tiniest carrots made to use as baguettes to go around my One Carrot necklace. I will post pics later.


What you’ll need to create your own Carrot jewelry:
  • needle felting needle
  • roving wool (orange and green)
  • jump ring (I used an orange jump ring to match)
  • chain or anything to hang your carrot onto.
  • Styrofoam pad or needle felting pad.
  • If you are making a ring, bracelet or earrings, then you will need the appropriate hardware for that.
Here's how:
  • With your orange color roving wool and your needle felting needle, take a small amount of wool and roll in between the palms of your hand to create a worm like shape. Size is completely a matter of preference and what piece of jewelry you are going to make.
  • Then with a small Styrofoam pad and your felting needle you are going to start to form the shape of a carrot, easily done by starting at the thickest end and narrowing it down to the bottom, making sure to poke it until it is completely felted. 
  • Then with the green roving wool and the needle, add the topper to the carrot by simply poking it into the top of the carrot to join.  
  • *You can add leaves or a vine and use the vine as the necklace part.
  • Then add your jump ring through the middle of the green top and place onto a piece of leather or chain or whatever you choose. 
  • Make a One Carrot piece of jewelry or as many Carrots as you like.  

 This was a post I received from one of our Ravelry members regarding the pattern.


From: KnittingSM
replied
Today
12:09 PM

re: KnittingSM commented on your One Carrot Necklace
Sent at 12:01 PM Today
Brilliantly funny. It was the day before Thanksgiving and they were getting some last minute supplies. They are both in the produce section and he calls out “Baby, do we need some carrots?”
She: “No, we’ve got them.” (not looking up)
He: “Baby, how about we get some carrots?”
She: “Aaron, I already told you we have them!” (still not looking up)
He: “baby, how about a half carrot?”
Finally looks up to see the ring, starts crying. The manager came over worried about what was going on. My brother “We just got engaged in your produce section!!” manager gave them a bouquet of flowers as congrats.
I’ll have to keep the necklace in mind if you post a pattern. I think she’d love one.


Monday, September 28, 2009

Pass the Jeans Please

PTJPPTJPArtfelt needle felting

I am also including this little cool photo/note combo piece so each person that the jeans are passed to next will write something in it of why/what they did on the jeans and a quick picture of them next to the jean, or in the jeans or on top of them whatever.

I thought this would be fun… Here it goes…I am going to take a pair of plain jeans and I am going to mail them to who ever signs up for this experiment. The idea is for each person that receives the jeans, to either embroider, sew, bead, paint, iron, quilt, needle felt, design, etc. something onto the jeans and then mail them onto the next person on the list. You can keep the jeans anywhere from 1-3 day’s to create your design idea…Then mail them on to the next person on the list, and sew on and sew on.  All in fun…If this is a successful Pass-Along then anyone who has participated in this project will be on the list to send the next pair of their jeans…
Here are some ideas…
My Embellished ADHD pants.mooembellished jeans


Thursday, September 24, 2009

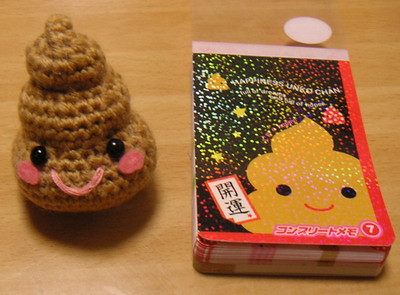
poop

Why do we need a “POOP” chart?
The more important question is, Why did I need to start a subject on a POOP chart? Why did I have to capitalize the word “POOP” in my post? Life’s unanswered questions.


poop chart

Some POOPY Patterns and other related Poopy things from different designers across the web.
http://www.flickr.com/photos/pocketfarm/

it's a (knitted) poop! by pocket farmer.

CO 6 st. Join to knit in the round. (I used size 7 needles and Plymouth Tweed yarn)
Increase 2 st (8 st total)
Knit around.
Increase 4 st every other row until you have 16 st
Knit 3 rows
Decrease 4 st every other row until you have 8 st
Knit around
Decrease 2 st (6 st remaining)

Take the opportunity to add stuffing before starting the next lobe.

Next row, increase 2 st,
then increase the same way as for the first lobe, except vary slightly by doing more increases,
and/or more plain rows before decreasing.

Knit as many lobes as desired, stuffing as you go.
When you have six st remaining, put yarn on a tapestry needle,
and thread through the stitches.
Happy Poo Pattern
happy poo
Here it is, the Happy Poo pattern. I'm not used to writing down patterns. I'm more accustomed to the Jpns way of using number charts, so my apologies to those who prefer written instructions. If there is anything that seems unclear, please let me know.


sc = single crochet
Work in rounds. It's up to you if you want to join rounds or not
Make adjustable loop. (Here's a link that shows you how : Adjustable Loop)ROUND 1 - 6sc
ROUND 2 - 12sc
ROUND 3 - 18sc
ROUND 4 - 24sc
ROUND 5 - 30sc
ROUND 6 - 36sc
ROUND 7 - 36sc
ROUND 8 - 30sc
ROUND 9 - 24sc
ROUND 10 - 18sc
ROUND 11 - 12sc
ROUND 12 - 18sc
ROUND 13 - 24sc
ROUND 14 - 24sc
ROUND 15 - 24sc
ROUND 16 - 18sc
ROUND 17 - 12sc
ROUND 18 - 6sc
ROUND 19 - 12sc
ROUND 20 - 18sc
ROUND 21 - 12sc
ROUND 22 - 6sc
ROUND 23 - 6scDon't forget to add the stuffing before you're done that top layer. When you're finished leave a tail long enough to cinch up between the layers. Add the face and voila, your very own little Happy Poo! 
This pattern is for personal use only. You cannot use this pattern for profit.


http://wastesomecash.com/party-pooper-fake-poop.html?gclid=CJSFg6Wrhp0CFSn6agodRFvDag
fake human poopy
alt text


 Pop Art Roll of toilet paper toilet paper cozy cover:
I found this on the http://craftside.typepad.com/craftside/april-24-30-09/ blog and would like to give her full credit for the pattern. She calls it Pop Art. I call it Pretty Darn Cute! 
Roll of toilet paper cozy cover

Pretty funny, hu?
To make your own TP cozy you'll need:
Materials
Gray worsted weight yarn
White Worsted weight yarn
size H crochet hook
yarn needle
How to crochet the roll of toilet paper cozy:
With the gray yarn:
Chain 4 and slip stitch to join
Chain 1
About 15 sc into circle and join
chain 1
single crochet around again, about every 3rd or 4th stitch do a second sc in the same loop. This will increase the size of the circle allowing it to stay flat. Adjust number of stitches as needed to lay flat.
Cut gray yarn and weave in the end.
With the white yarn:
SC around gray circle every few stitches doing two sc in one loop. Join each circle, then chain 1 and repeat until you have a circle the size of your roll of toilet paper. For me this was about 6 rows (circles)
For the side:
Chain 15
Chain 1 and sc into second to last stitch.
SC back into every chain stitch, chain 1, turn and sc back into every stitch. Adjust number of stitches as needed for your roll of toilet paper.
Repeat until you have a strip long enough to go around the entire roll of toilet paper plus a few inches to fall open. For me it was about 20 inches.
Stitch the top to the sides and then join the beginning of the side strip under the falling open end.
Weave in all the ends.
Mr. Poopyhead

poopy-head-father-in-lawShhexy gives a helping hand

halloween
http://www.halloweenexpress.com/poopie-shorts-adult-costume-p-3956.html


poop pants


Sunday, September 13, 2009

Pink decoupaged guitar


I loved making this $10.00 guitar scream "L@@K" at me. This was a plain guitar that was purchased at a fair here in Vegas. It cost a whole $10.00, the embellishments, pretty much free, I used pictures from craft magazines that I already had. The glue, decoupage glue can be purchased at Walmart or any craft store and Sealant gloss or matte. Sand paper is optional, but I recommend using it to prepare your surface so that the pictures adhere and stay better. The rest is all up to you. You can go with a color scheme and theme. Or you can just go wild and tear and paste anything that you think will look good. To see different angles and views of this sweet guitar, just click on the link under the picture.


Saturday, September 12, 2009

Season Clearing House

This is the perfect time of year to pack away the summer and bring on the wooly. That is if you lived any other place but the desert. Although we do have somewhat of a climate change, we are still not hitting those low temps on the thermometers. I have been living in Las Vegas for over three decades now, and I swear I say the same thing every single year, "Is it me, or is it colder this year then it was last year? I think the real answer to that question is, "I am getting older, my bloods getting thinner and so is my skin". I dare not complain though, I would hate to put a damper on our wonderful fall/winter seasons. So the whole point of this story is that when I was going through closets and closets of clothes, I came across things that I hadn't seen in years. I actually found a dress that I loved and hadn't worn in at least 15 years or so. I decide I could really put myself in a great mood or I can sink my battleship. Should I dare try on this dress? I did, it fit, I'm stoked, and that dress ain't goin' anywhere. It is going to hang right there in my closet until another decade or so rolls by. I will post a pic of me in this dress, so you can see what I mean, when I say how pleased I am that the dress still fits.

Thursday, September 10, 2009

You can make all kinds of fantastic pieces with buttons. I love, love, love buttons. I could spend hours just sorting through all these unique little treasures. The options are endless. So gather up those buttons and create something.


Tuesday, September 8, 2009

Olivia's Digg's


My beautiful baby Olivia.
 This is my newest niece. Isn't she gorgeous. She is wearing one of my latest designs. Called "Olivia's Diggs".
These are the perfect gift for that special little girl. Onesies are always in style and every baby wears them.

Perfect Paper Doll Keepsake Collection

Perfect Paper Doll Collection
This is a wonderful way to keep your little ones enchanted for hours on end. You can make these wonderful paper doll keepsake boxes and dolls complete with an entire wardrobe and accessories fit for any princess. These paper dolls can be played with, without worrying about paper cuts and little tears. Never have to worry about those little folds getting torn off, because to make these little treasures you will cut them off yourself.  So gather up all your supplies and make your little princess her very own keepsake to past on from generation to generation. 

WHAT YOU'LL NEED:
  1. scissor
  2. printed color or black and white copies of paper dolls. You can either get these from the internet or use old paper dolls from many other resources. Here is a great source for your cut outs. http://alteredartfun.blogspot.com/2009/02/vintage-paperdolls.html
  3. decoupage glue http://www.plaidonline.com/apmp.asp#ModPodgeBrands
  4. a box (Pier 1 is a great resource for unique shaped boxes). http://www.pier1.com/SearchResults/tabid/37/txtSearch/boxes/Search/boxes/List/0/Default.aspx
  5. reusable adhesive The most important part of the whole project. http://www.acecatalog.com/bluestiktrade_reusable_adhesive-pi-27466.html Any brand is fine, just make sure it is OK for age appropriate children.
  6. laminate http://www.epinions.com/review/Avery_Self_Stick_Laminating_Sheets_9_x_12_3_mil_50_Sheets_Box/content_27328194522 (I have my own laminate machine, but you can use the Self Stick Laminating Sheets. They are reasonable in price and work just as well.
  7. brush for use with decoupage, I like to use a sponge brush.Here is the kind I use, they come in different sizes. http://www.woodcrafter.com/rpb11inspongebrushpkg10.aspx     
  8. sealant This is optional, but I love the finished look of this. This is the brand I use. http://www.dickblick.com/products/krylon-triple-thick-crystal-clear-glaze/?wmcp=cj&wmcid=feeds&wmckw=21710-1005-2342&AID=10495307&PID=1609763&SID=tfc_-_11_6_090908_e11deec4d563a3478557f9206308    
  9. brayer http://www.misterart.com/g453/Speedball-Rubber-Brayer.htm
HERE'S HOW TO MAKE THE PAPER DOLLS: 

  1. Print out all the paper dolls that you are going to use.
  2. Then before you are ready to laminate them, cut them out, not detailed cutting, but just so that you can fit as many paper dolls on the page as possible. Then you are going to laminate them.
  3. After all the dolls, wardrobe and accessories are all laminated, take a sharp pair of scissors and start cutting each piece out neatly. Make sure that you also cut the little tabs off that you would normally keep on if you were cutting out paper dolls the old fashion way. 
  4. Now with the reusable putty, add some little dabs to the front of your paper doll and then you can start to dress your doll with any outfit your little heart desires. 

HERE'S HOW TO MAKE THE KEEPSAKE DECOUPAGE BOX:
  1. Cut out enough paper dolls and accessories as needed to cover the inside and outside of your box.
  2. Now you are going to add a coat of decoupage glue to the portion of the box you are ready to place your paper dolls onto. 
  3. Continue adding all your cutouts leaving the paper doll tabs on this time for the effect. 
  4. When your entire box is covered to your satisfaction, it is now time to completely coat the entire box.
  5. Let dry over night, and then you can add as many coats as you like to give it a sealed, glossy or matte look, depending on the type of Decoupage glue you are going to use. You can also use regular white craft glue, but I suggest you add water to thin it out.
  6. Then when you are sure that every inch of the box is dry, you can seal it with a Sealant. That is optional. I love to add this extra step, I love the look of this.
  7. Now take all your laminated paper dolls and putty and fill up your Decoupaged Paper Doll Keepsake Box.


Monday, September 7, 2009

and were back again...

That is were back to changing the name of my Ravelry group from ADHD KNITTERS to STRAIGHT JACKET KNITTING, and now to ADHDKNITTING. Now having done this, I cannot get into my own group to edit anything. I forgot to make myself the Administrator. I have sent a letter to the Help folks on Ravelry and hopefully they will help me out. Fingers crossed.

Friday, September 4, 2009

Famous Chicken Salad, NOT, but damn good chicken salad...

Recipe to my Famous Chicken Salad
Here's what you'll need:
Chicken (whole chicken) or you can just use chicken breasts.
celery
onions
fat-free mayo
garlic salt
pepper
*carrots optional for the soup broth when the chicken is cooked.
Here's how:
With a large pot, fill with water and add all the above ingredients except for the mayo. Cover and cook on a low light until the chicken is completely cooked.
Take the chicken out of the pot and put aside until it cools down enough for you to remove all the chicken from the bone.
With a large mixing bowl, add the chicken, meat only, making sure that you have removed all the skin, bones, and gristle.
Of course your hands and your nails should be spotless.
Take your onions and celery and with a grater, grate them on the smallest grate directly into the bowl with the chicken.
Add the seasonings and the mayo.
Here's the most important part, with your hands start to mix the ingredients until the chicken salad is the consistency of a spread. Trust me on this. Then take tin foil or plastic wrap and place in refrigerator for a couple hours to let it cool down and to let all the ingredients ferment. We love to serve on large fresh rolls with lettuce, tomatoes and onions.
The broth is perfect as a side dish with egg noodles to complete this meal.

Tuesday, September 1, 2009

Now this is priceless...

We all love our ice-cream, but really...

Snakes Charmed I'm Sure

Snakes Charmed I'm Sure

Knitted, felted snakes attached to a knitted felted wool basket. I love the idea of these colorful snakes slithering around this charming basket. A great way to keep your yarn or your UFO's in order. The double headed snake above the lip of the basket separates this snake charmer from all the rest.

Sunday, August 30, 2009

Crazy beautiful sun...


crazy beautiful sun
Originally uploaded by adhd_knitting
This is exactly what the sun looked like today Sunday, August 30, 2009 in Las Vegas, Nevada at sundown. I have never seen anything like this is my entire life. It was surreal...